Celo is an emerging blockchain ecosystem focused on increasing cryptocurrency adoption among smartphone users. With its mobile-first approach, Celo aims to empower users by making financial dApps and crypto payments accessible and straightforward. By adding the Celo network to MetaMask, users can manage Celo tokens and interact with its vibrant ecosystem right from their wallets. This article will guide you through the steps to integrate Celo with MetaMask, from basic setup to importing Celo tokens.
CELO NETWORK INFORMATION
- Network Name: Celo Mainnet
- RPC URL: https://forno.celo.org
- Chain ID: 42220
- Currency Symbol: CELO
- Block Explorer URL (Optional): https://explorer.celo.org
How to Add Celo to MetaMask
In the rapidly expanding universe of cryptocurrencies, the integration of different blockchain networks with your digital wallet is not just a convenience, it’s a necessity. Here is how to add Celo to your MetaMask wallet, covering both automatic and manual methods, as well as the process for mobile users.
Adding Celo to MetaMask Automatically
Adding Celo to MetaMask can be done automatically through Celo Explorer, a block explorer for Celo. This method simplifies the process significantly:
1. Celo Explorer: Go to Celo Explorer. At the bottom of the page, you’ll find the “Add Celo” button, which includes a MetaMask icon.

2. Approve connection: Clicking this will prompt a MetaMask notification asking for permission to add the Celo Network. Confirm the action.
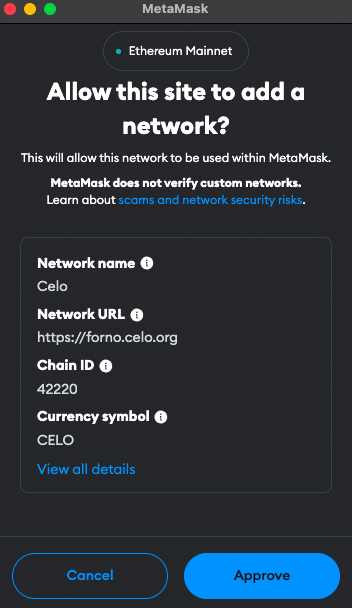
3. Switch the network: MetaMask will automatically fill in all the necessary network details. You can now switch the network.
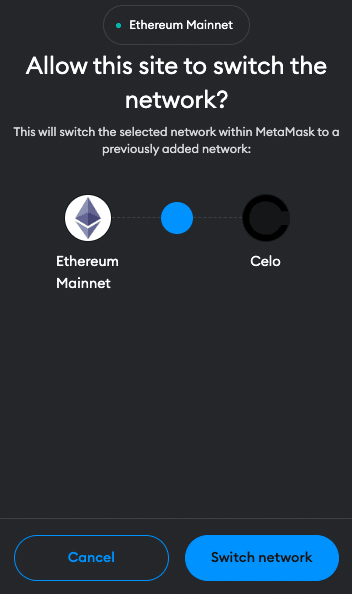
Adding Celo to MetaMask Manually Using the Celo Address
If you prefer a manual approach or encounter issues with the automatic method, adding Celo to MetaMask is straightforward. Follow these steps:
1. Open MetaMask: Click on the MetaMask extension in your browser.
2. Open menu: At the top of the app, you will see the current network (usually Ethereum Mainnet by default). Click on it to open the menu and select “Add Network”.

3. Select Network: Search for Celo Mainnet on the list and click “Add”. Check the network details on the screen and click “Approve”.

Alternative: Instead of adding Celo from the list you can also click on “Add a network manually” at the bottom of the page. Proceed as follows:
4. Enter Network Details: In the new screen, enter the Celo network details as follows:
- Network Name: Celo Mainnet
- RPC URL: https://forno.celo.org
- Chain ID: 42220
- Currency Symbol: CELO
- Block Explorer URL (Optional): https://explorer.celo.org
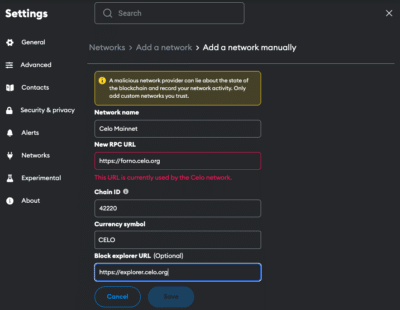
5. Save and Use: Click “Save” to add the network.
Adding Celo to the MetaMask Mobile App
Adding Celo to the MetaMask mobile app involves a similar process to the desktop version:
1. Open MetaMask App: Launch the MetaMask app on your mobile device.
2. Open menu: Tap on the network dropdown menu at the top of your screen and select “add network”.
3. Select Network: Search for Celo Mainnet on the list and click “Add”. Check the network details on the screen and click “Approve”.
Alternative: Instead of adding Celo from the list you can also click on “custom networks”. Proceed as follows:
4. Enter Network Details: In the new screen, enter the Celo details as follows:
- Network Name: Celo Mainnet
- RPC URL: https://forno.celo.org
- Chain ID: 42220
- Currency Symbol: CELO
- Block Explorer URL (Optional): https://explorer.celo.org
5. Add and Switch: Add the network.
Add Celo Testnet Information to MetaMask
For developers or users interested in testing, adding a Celo Testnet to MetaMask is beneficial. Be aware that several testnet options can be available. Here is how you do it:
1. Open MetaMask and Add Network: Follow the initial steps as described in the manual addition of Celo.
2. Details for the Celo Testnet:
- Network Name: Celo Alfajores
- RPC Url: https://alfajores-forno.celo-testnet.org
- ChainID: 44787
- Symbol: CELO
- Block Explorer URL: https://alfajores-blockscout.celo-testnet.org
3. Save and Switch: Save the settings to add the Celo Testnet to your MetaMask.
Import Celo Tokens Into MetaMask
CELO is the native utility token of the Celo platform. In order for other tokens to be visible in the MetaMask, they must first be added. Here’s how you can import Celo tokens into your MetaMask wallet:
1. Access Your Wallet: Open MetaMask and ensure you’re on the Celo network.
2. Find Token Contract Address: Locate the contract address of the Celo token you want to add. This can usually be found on the project’s website or on the block explorer Celoscan.
3. Add Token in MetaMask: Click on “Import tokens” at the bottom of the main MetaMask screen.
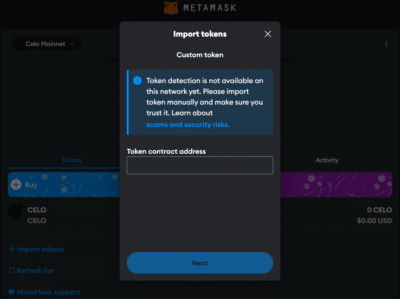
4. Enter Token Details: Paste the token’s contract address into the “Token contract address” field. The other fields should automatically fill in.
5. Complete the Addition: Click “Next” and “Import”. The Celo token will now appear in your wallet.
Alternative: Visit Coinmarketcap or Coingecko and find the token you want to add. Click on the MetaMask icon and the token will be added to your Wallet. You can also copy the contract address and proceed as described above.
Why use the Celo Network?
Adopting the Celo network on MetaMask lets you participate in a global financial ecosystem including advantages like:
- Mobile-First Design: Celo’s focus on mobile accessibility makes it exceptionally user-friendly, especially for those relying on smartphones for financial transactions.
- Fast and Cost-Effective Transactions: Celo provides faster transaction confirmations and lower fees, which is beneficial for frequent and micro-transactions.
- Stablecoins and DeFi: Celo supports various stablecoins and DeFi applications, facilitating easy and stable digital transactions and financial services.
- Growing Ecosystem: Being a part of the Celo network gives you access to a burgeoning ecosystem of applications and services geared towards a decentralized future.
Kick-start for MetaMask
Ensure your MetaMask wallet is set up to add the Celo network. If you haven’t installed MetaMask yet, follow these steps to do so.
Install MetaMask
MetaMask acts as a bridge to the decentralized web, allowing users to interact with decentralized applications (DApps), manage a variety of cryptocurrencies, and connect to different blockchain networks, including Ethereum and Celo. Its ease of use, security features, and widespread adoption make it an essential tool for anyone looking to explore Web3 and the blockchain space. Here’s how to get started:
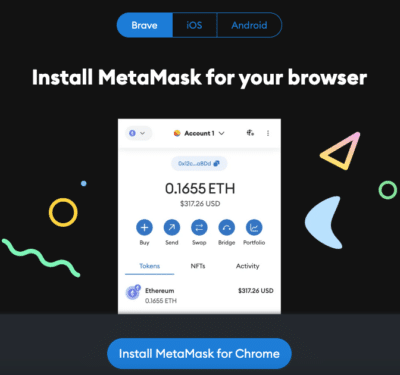
1. Download MetaMask: Visit the official MetaMask website (metamask.io) and download the MetaMask extension for your preferred browser (Chrome, Firefox, Edge, Brave or Opera). Install and follow the prompts to add the MetaMask extension to your browser.
2. Create a Wallet: After installation, open the MetaMask extension and select “Create a Wallet”. Follow the instructions to set up your wallet.

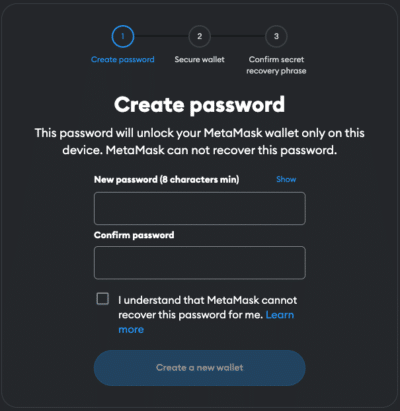
3. Create password: Create a secure password. Password managers can help you to create unique and secure passwords.
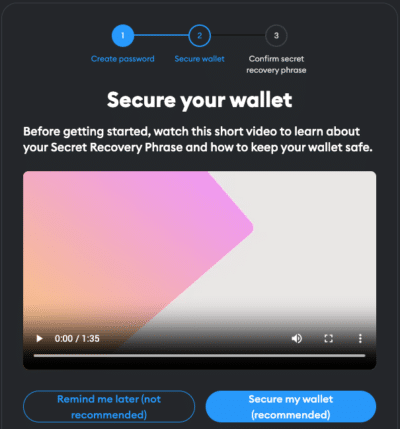
4. Secure Your Wallet: Write down your recovery phrase and store it in a secure location. This phrase is essential for recovering your wallet if you forget your password or change devices.
5. Confirm recovery phrase: Finish the setup process by filling in the missing words.


Info: If your device gets damaged or lost, you won’t be able to access your funds without the recovery phrase. Remember, to store your secret recovery phrase safely and never disclose it to anyone.
Adding Funds to Your MetaMask Account
After successfully adding the Celo network to your MetaMask wallet, the next step is to fund your account to start interacting with the Celo ecosystem. Here is how you can add funds to your MetaMask wallet:
- Buying CELO on an Exchange: Purchase CELO directly on a cryptocurrency exchange and withdraw it to your MetaMask wallet. This method is convenient if you are starting from fiat currency or trading other cryptocurrencies for CELO.
- Direct Deposit from an Exchange: If you already have CELO or other compatible assets on an exchange, you can withdraw them directly to your MetaMask wallet by selecting the Celo network during the withdrawal process. Ensure the exchange supports Celo withdrawals to avoid any mishaps.
- Using Third-Party Bridges: For assets on other blockchains, you can use third-party bridges to transfer them to the Celo network. This option is ideal for moving assets from networks like Ethereum to Celo, maintaining interoperability and extending your investment possibilities.
Info: At the time of publication of this article, Celo does not have an official bridge. While third-party bridges offer valuable services for asset transfers across networks, they carry inherent risks. The security and reliability of these bridges can vary, and there have been instances of vulnerabilities leading to significant losses. Always conduct thorough research to ensure you’re using a reputable and secure bridge. Consider the bridge’s history, user reviews, and any reported security incidents before proceeding with your transaction.
FAQ about adding Celo to MetaMask
How to add Celo to MetaMask?
To manually add Celo to MetaMask, open the MetaMask extension, click on the Network dropdown menu and select “Add Network”. Enter the network details for Celo, including Network name, RPC URL, Chain ID, Currency, and block explorer.
How to add Celo to MetaMask automatically?
You can add Celo to MetaMask automatically by visiting Celo Explorer and clicking on the “Add Celo” button. This will prompt MetaMask to add the network with pre-filled details.
How to add Celo to MetaMask mobile?
On the MetaMask mobile app, go to the dropdown menu and select “Add Network”. Choose Celo from the list or go to “custom networks” and enter the same Celo network details as for the desktop version.
Does MetaMask Accept the Celo Network?
Yes, MetaMask does accept the Celo network. Users can manually add both the mainnet and testnet versions of Celo to their MetaMask wallet.
What Is the Chain ID for the Celo Network?
The Chain ID for the Celo mainnet is 42220. This unique identifier is used to distinguish the Celo network from other networks in MetaMask.
What Is the RPC URL for the Celo Network?
The RPC URL for the Celo mainnet is https://forno.celo.org. This URL may be updated, so it’s advisable to check the latest from official Celo resources.
Conclusion
Adding Celo to your MetaMask wallet opens up a world of possibilities in terms of managing digital assets and interacting with decentralized applications. It not only simplifies the process of sending and receiving tokens but also connects you to a broader network dedicated to making cryptocurrency accessible for everyone. Due to the multitude of applications and operations, effective management and tracking of crypto assets is crucial. CoinTracking offers a comprehensive solution that covers everything from portfolio management to tax calculation.


