As the blockchain space expands, so does the need for interoperability and access to diverse networks. This is where Avalanche comes in. Avalanche is a highly scalable, decentralized platform designed for launching decentralized applications (DApps) and enterprise blockchain deployments in one interoperable ecosystem. Its unique architecture has made it a preferred choice for users seeking fast transactions and low fees. The integration of Avalanche into MetaMask is a decisive step towards being able to interact with the network. In this guide, we'll walk you through the steps to seamlessly integrate Avalanche into your MetaMask wallet.
Avalanche Network Details:
Network Name: Avalanche Network
RPC URL: https://api.avax.network/ext/bc/C/rpc
Chain ID: 43114
Currency Symbol: AVAX
Block Explorer URL (Optional): https://snowtrace.io/
How to Add Avalanche to MetaMask
In the rapidly expanding universe of cryptocurrencies, the integration of different blockchain networks with your digital wallet is not just a convenience, it's a necessity. Here is how to add Avalanche to your MetaMask wallet, covering both automatic and manual methods, as well as the process for mobile users.
Adding Avalanche to MetaMask Automatically Using Snowtrace
Adding Avalanche to MetaMask can be done automatically through Snowtrace Multichain Explorer, a block explorer for Avalanche. This method simplifies the process significantly:
- Navigate to Snowtrace: Go to Snowtrace. At the bottom of the page, you'll find the "Add C-Chain Network" button, which includes a MetaMask icon.

Add C-Chain Network button on Snowtrace - Approve connection: Clicking this will prompt a MetaMask notification asking for permission to add the Avalanche Network. Confirm the action.
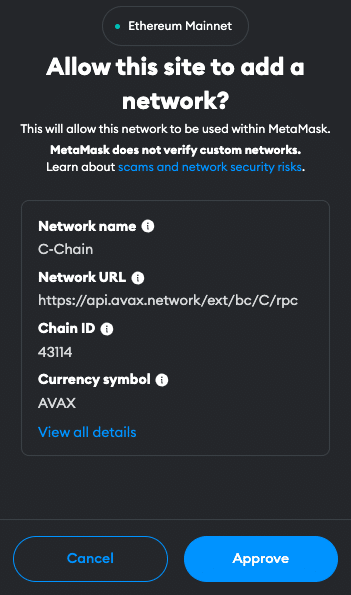
Approve Avalanche network connection in MetaMask - Switch the network: MetaMask will automatically fill in all the necessary network details. You can now switch the network.
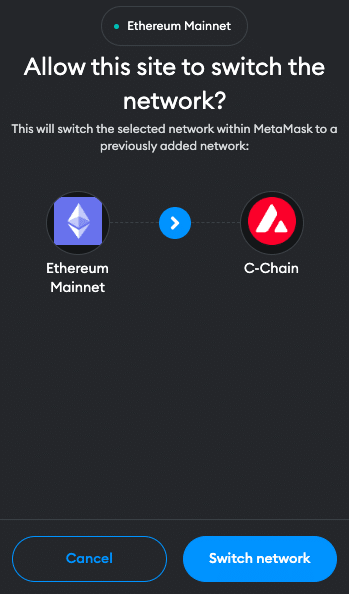
Switch to Avalanche network in MetaMask
Adding Avalanche to MetaMask Manually Using the Avalanche Address
If you prefer a manual approach or encounter issues with the automatic method, adding Avalanche to MetaMask is straightforward. Follow these steps:
- Open MetaMask: Click on the MetaMask extension in your browser.
- Open menu: At the top of the app, you will see the current network (usually Ethereum Mainnet by default). Click on it to open a dropdown menu and select "Add Network".
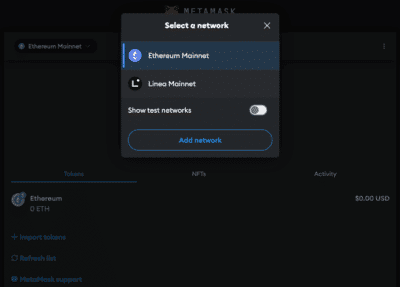
Open network menu in MetaMask - Select Network: Search for "Avalanche Network C-Chain" on the list and click "Add". Check the network details on the screen and click "Approve".
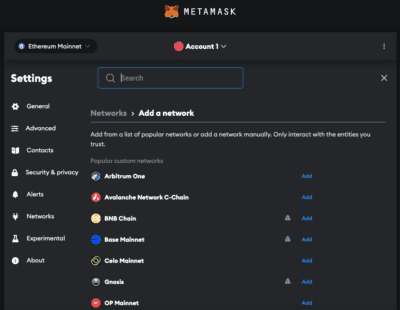
Select Avalanche C-Chain network in MetaMask
Instead of adding Avalanche from the list you can also click on "Add a network manually" at the bottom of the page. Proceed as follows:
- Enter Network Details: In the new screen, enter the Avalanche network details as follows:
- Network Name: Avalanche Network
- RPC URL: https://api.avax.network/ext/bc/C/rpc
- Chain ID: 43114
- Currency Symbol: AVAX
- Block Explorer URL (Optional): https://snowtrace.io/
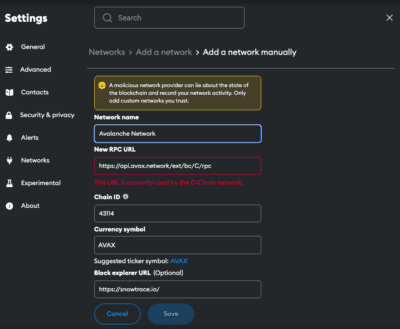
Enter Avalanche network details in MetaMask - Save and Use: Click "Save" to add the network.
Adding Avalanche to the MetaMask Mobile App
Adding Avalanche to the MetaMask mobile app involves a similar process to the desktop version:
- Open MetaMask App: Launch the MetaMask app on your mobile device.
- Open menu: Tap on the network dropdown menu at the top of your screen and select "add network".
- Select Network: Search for Avalanche C-Chain on the list and click "Add". Check the network details on the screen and click "Approve".
Instead of adding Avalanche from the list you can also click on "custom networks". Proceed as follows:
- Enter Network Details: In the new screen, enter the Avalanche details as follows:
- Network Name: Avalanche Network
- RPC URL: https://api.avax.network/ext/bc/C/rpc
- Chain ID: 43114
- Currency Symbol: AVAX
- Block Explorer URL (Optional): https://snowtrace.io/
- Add and Switch: Add the network.
Add Avalanche Testnet Information to MetaMask
For developers or users interested in testing, adding the official Fuji Testnet to MetaMask is beneficial. Here is how you do it:
- Open MetaMask and Add Network: Follow the initial steps as described in the manual addition of Avalanche.
- Details for Avalanche Testnet:
- Network name: Avalanche C-Chain
- RPC URL: https://api.avax-test.network/ext/bc/C/rpc
- Chain ID: 43113
- Currency symbol: AVAX
- Block explorer URL: https://testnet.snowtrace.io
- Save and Switch: Save the settings to add the Avalanche Testnet to your MetaMask.
Import Avalanche Tokens Into MetaMask
AVAX is the native utility token of the Avalanche platform. In order for other tokens to be visible in the MetaMask, they must first be added. Here's how you can import Avalanche tokens into your MetaMask wallet:
- Access Your Wallet: Open MetaMask and ensure you're on the Avalanche network.
- Find the Token Contract Address: Locate the contract address of the Avalanche token you want to add. This can usually be found on the project's website or on the block explorer Snowtrace.
- Add Token in MetaMask: Click on "Import tokens" at the bottom of the main MetaMask screen.
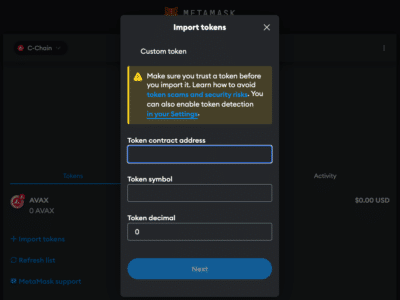
Import Avalanche tokens in MetaMask - Enter Token Details: Paste the token's contract address into the "Token contract address" field. The other fields should automatically fill in.
- Complete the Addition: Click "Next" and "Import". The Avalanche token will now appear in your wallet.
Visit Coinmarketcap or Coingecko and find the token you want to add. Click on the MetaMask icon and the token will be added to your Wallet. You can also copy the contract address and proceed as described above.
Creating a Crypto Tax Return Made Easy
CoinTracking's tax calculator enables you to easily and accurately calculate your crypto taxes. Avoid mistakes and stress!
Why use the Avalanche Network?
The Avalanche network has rapidly emerged as a leading platform in the blockchain and decentralized finance (DeFi) space, attracting users and developers with its unique blend of speed, security, and scalability. Here are the key reasons why the Avalanche network stands out:
- High Throughput and Fast Finality: Avalanche boasts one of the highest transaction output rates in the industry, capable of processing thousands of transactions per second. This is complemented by its sub-second transaction finality. Such performance ensures that applications built on Avalanche can scale to meet demand without the bottlenecks experienced on other networks.
- Low Transaction Fees: Compared to networks like Ethereum, where transaction fees can become prohibitively expensive during peak usage, Avalanche maintains much lower fees.
- Eco-Friendly Consensus Mechanism: Avalanche uses a novel consensus mechanism that is not only highly efficient but also environmentally friendly.
- EVM Compatibility: The Avalanche C-Chain (Contract Chain) is fully compatible with the Ethereum Virtual Machine (EVM), making it easy for developers to port existing Ethereum applications to Avalanche.
- Robust DeFi Ecosystem: Avalanche has cultivated a rich ecosystem of DeFi applications, including automated market makers (AMMs), lending platforms, yield farming protocols, and more.
- Strong Community and Developer Support: Avalanche benefits from a strong, active community and developer ecosystem. With comprehensive documentation, development tools, and support from the Avalanche Foundation, developers find it an attractive platform for building their projects. Meanwhile, the community's enthusiasm and participation contribute to the network's security, governance, and overall vibrancy.
- Interoperability and Custom Blockchain Networks: One of Avalanche's standout features is its support for creating custom blockchains (subnets) that can operate with their own rules and validators while still benefiting from the security and interoperability of the Avalanche network. This flexibility allows for a wide range of use cases, from private enterprise blockchains to specialized financial networks.
Jump Start for MetaMask
Ensure your MetaMask wallet is set up to add the Polygon network. If you haven't installed MetaMask yet, follow these steps to do so.
Install MetaMask
MetaMask acts as a bridge to the decentralized web, allowing users to interact with decentralized applications (DApps), manage a variety of cryptocurrencies, and connect to different blockchain networks, including Ethereum and Avalanche. Its ease of use, security features, and widespread adoption make it an essential tool for anyone looking to explore Web3 and the blockchain space. Here's how to get started:
-
Download MetaMask: Visit the official MetaMask website (metamask.io) and download the MetaMask extension for your preferred browser (Chrome, Firefox, Edge, Brave or Opera). Install and follow the prompts to add the MetaMask extension to your browser.
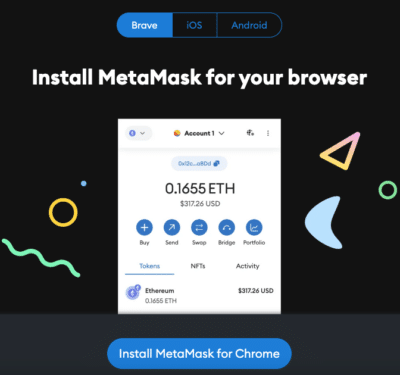
Download MetaMask from the official website -
Create a Wallet: After installation, open the MetaMask extension and select "Create a Wallet". Follow the instructions to set up your wallet.

Create a new wallet in MetaMask -
Create password: Create a secure password. Password managers can help you to create unique and secure passwords.
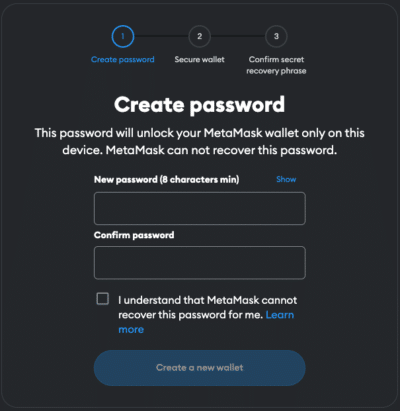
Create a secure password for your MetaMask wallet -
Secure Your Wallet: Write down your recovery phrase and store it in a secure location. This phrase is essential for recovering your wallet if you forget your password or change devices.
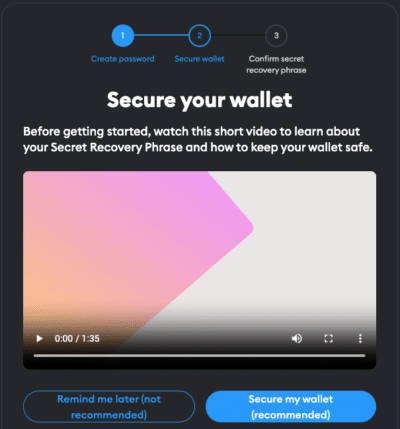
Secure your MetaMask recovery phrase -
Confirm recovery phrase: Finish the setup process by filling in the missing words.
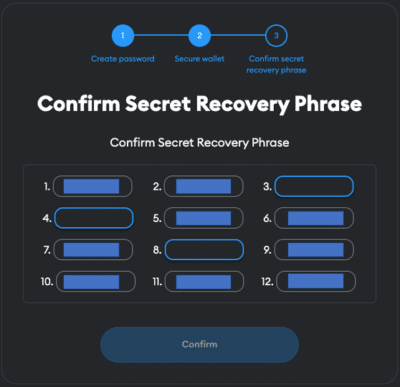
Confirm your MetaMask recovery phrase 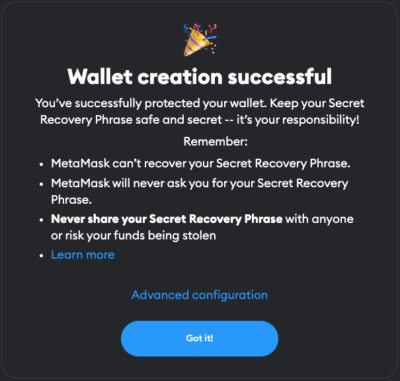
Complete MetaMask setup
If your device gets damaged or lost, you won't be able to access your funds without the recovery phrase. Remember, to store your secret recovery phrase safely and never disclose it to anyone.
Adding Funds to Your MetaMask Account Using the Core Bridge
After successfully adding the Avalanche network to your MetaMask wallet, the next step is to fund your account to start interacting with the Avalanche ecosystem. The Avalanche Core Bridge is a secure and user-friendly way to transfer assets between different networks. Here's how to use it:
- Connect MetaMask: Open the Core Bridge Website and connect your MetaMask Wallet.
- Select network: Select the network you want to transfer the funds from to Avalanche.
- Select Assets: Select the token and enter the amount you want to transfer to Avalanche. Common choices include ETH, but other tokens compatible with the Avalanche network can also be selected.
- Transfer funds: Check the details and click "Bridge Tokens". This step will prompt a transaction in MetaMask, requiring your confirmation. Be mindful of Ethereum gas fees at this stage, as they apply when transacting on the mainnet.
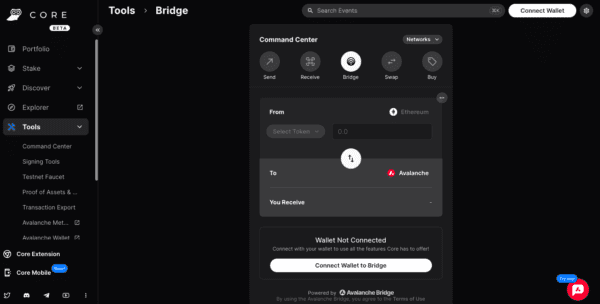
Transfer funds to Avalanche using Core Bridge - Receive funds: Wait for the network to process your transaction. Once confirmed, You should see your transferred funds available in your wallet on the Avalanche network.
In order to transfer funds to Avalanche, you must have the native currency (ETH in this case) available in your MetaMask wallet. If you don't currently have any ETH in your wallet, you'll first need to transfer some to your MetaMask wallet from an Exchange or another wallet.
Integrating the Avalanche network with MetaMask opens up a gateway to a diverse and rapidly growing ecosystem. Whether you're looking to explore new DeFi platforms, trade NFTs, or simply enjoy faster and cheaper transactions, Avalanche provides a robust infrastructure for your blockchain needs. Due to the multitude of applications and operations, effective management and tracking of crypto assets is crucial. CoinTracking offers a comprehensive solution that covers everything from portfolio management to tax calculation.